Posted in Blog, Recipes

Traditional Mayan Cooking Course

While Jason is taking Spanish classes, I signed up for a five day cooking course where we get to cook a different Mayan dish everyday. Today we learned how to make Pepian, a traditional Mayan chicken stew. I had met Angela, the owner and Ines, my teacher, earlier last week when I signed up for the class. When I got there, they were preparing a fire in the outdoor kitchen set in a beautiful garden space. It is typical for Mayans to cook over an open fire.

img_0613
Angela setting the table.

Continue reading “Traditional Mayan Cooking Course”

Posted in Recipes

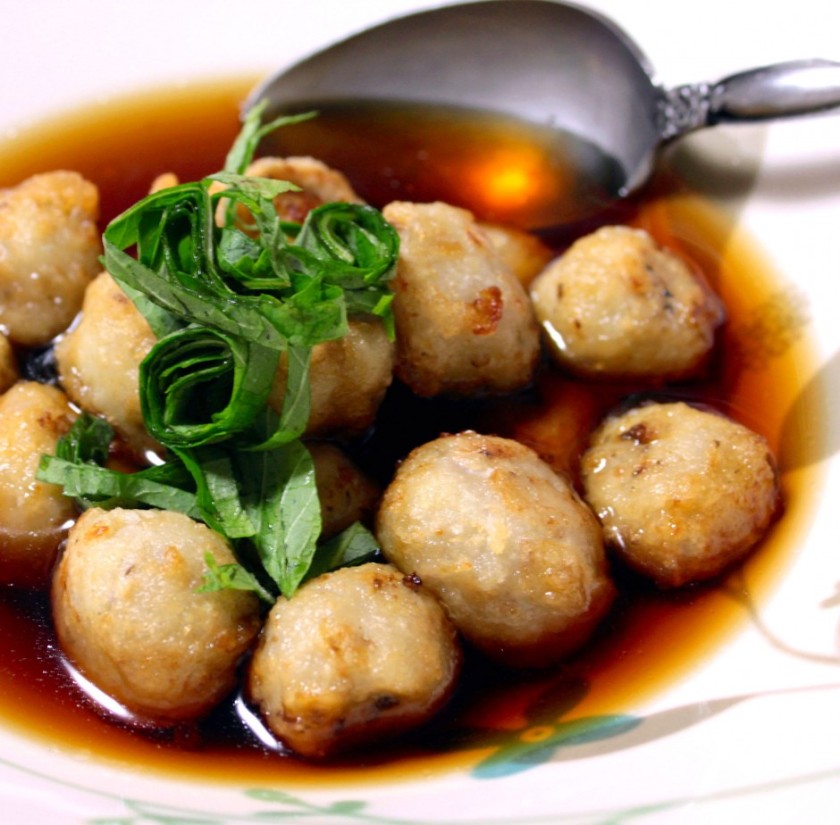
Fried Taro Potatoes with a Sweet and Sour Dipping Sauce

Taro potatoes have been commonly eaten in Japan since ancient times and are called Sato Imo. You may know taro potatoes used in a traditional Hawaiian dish called Poi. There are different varieties of taro and we grow the smaller ones common to Japan. Now taro is not the prettiest vegetable out there so when it is added to a CSA box you may not be inspired to use it right away. But don’t be shy! These hairy root crops are easy to prepare and very creamy and the texture even compared to marshmallows! Taro potatoes are known to boost your immune system. The extra mucus helps line the stomach and combat bacteria and virus. Unlike other potatoes, they are good for the digestion so they are great to eat when you are sick or have stomach problems. They are also said to help brain function and fight free radicals in the body.


里芋_1685-940x924

Continue reading “Fried Taro Potatoes with a Sweet and Sour Dipping Sauce”

Posted in Recipes

Better Than Spinach Creamed Greens Casserole!

IMG_2719
Serves: 8
Ingredients:
1 pound mustard greens or any other greens like chard or kale works too
1 large yellow onion, diced
2 tablespoons of olive oil
3/4 cup of Greek Yogurt
1/4 cup of mayonnaise
2 eggs, beaten
2 cloves of garlic, minced (or 1 teaspoon of garlic powder)
1 teaspoon of salt
1 teaspoon of nutmeg
1/2 teaspoon of black pepper
1/2 cup of fresh grated Parmesan cheese
1/2 cup of blue cheese or any other melty cheese of your choice

Continue reading “Better Than Spinach Creamed Greens Casserole!”

Posted in Recipes

Parsnip Taro Fritters by Camille Armantrout

IMG_1197

Taro Potatoes or Satoimo as we call it in Japan, are a great storage crop to have to get you through the winter. It is commonly eaten in Japan and our CSA members are just starting to get the hang of them. They have a high oxalic acid  content and are not suitable for eating raw so always make sure to cook them through. Popular ways of eating them are in soups and stews. My neighbor and CSA member, Camille Armantrout, has been busy experimenting with them and came up with this fabulous fritter recipe! I was lucky enough to be her taster yesterday!

PARSNIP-TARO FRITTERS

Taro, 1 cup boiled and peeled
Parsnip, 1/2 cup boiled or roasted
Onion or Scallions, 1/2 cup chopped
Garlic, 1 clove minced or 1/2 tsp garlic powder
Peanuts or any other nut, 1/2 cup coarsely chopped
Panko or bread crumbs, 1/2 cup
Salt, 1/2 teaspoon if using salted nuts, 1 tsp if using unsalted
Coconut, 1/2 cup shredded or flaked, unsweetened
Lemon or Lime juice or zest, 1 teaspoon
Cilantro, minced 2 tablespoons
Peanut oil or other frying oil
Sweet chili sauce (like Mai Ploya)

Using a potato masher, mush cooked taro and parsnip into small chunks.
Stir in onion, garlic, nuts, panko, salt, coconut, lemon and cilantro until uniformly blended. It will look like a sticky mess with lumps of taro and parsnip but have faith, these are going to be delicious.
Add 3 Tablespoons of oil to a hot pan.
When the oil is hot, drop spoonfuls of fritter mix into the pan, leaving lots of space between them.
Flip the fritters as soon as they are all in the pan to expose the oily side and use a spatula to press flat. This way the spatula won’t stick to the taro.
Turn heat to medium and fry for several minutes before flipping and pressing again.
Remove golden-brown fritters to a paper towel to drain.
Add oil to pan and scoop out stray bits of fritter if needed before frying the next batch.
Serve with sweet chili sauce.

Batter can be frozen and used another day.

Posted in Recipes

Orange and Date Arugula Salad by Beth Mullenberg

10806337_10205928665043905_5594730538809126310_n
This is from ‘Plenty More’ by Yotam Ottolenghi.  I highly recommend this cookbook to anyone wanting to experience new flavors with vegetables.
I didn’t have radishes or orange blossom on hand so just omitted them.  I had clementines instead of oranges so my version was a little sweeter. Still excellent.
Orange and Date Salad
Ingredients:
5 medium oranges (2.25 lbs-3 cups after peeling and slicing
3 large medjool dates pitted and quartered lengthwise
4 oz radishes, sliced paper-thin
1/3 small red onion sliced very thin
3 cups arugula
1 oz lollo rosso letucces (2-3 leaves torn into 1  1/4 in pieces-I used your butterhead)
1 cup cilantro leaves coarsely chopped
1/2 cup flat leaf parsley coarsely chopped
1/2 cup mint leaves coarsely torn
Dressing
2 TBSP lemon juice
1 clove garlic, crushed
1tsp orange blossom water
1/2 tsp ground cinnamon
2 tsp fennel seeds, toasted and lightly crushed
3 TBSP olive oil
salt and black pepper
To make the dressing, whisk together the lemon juice, garlic, orange blossom water, cinnamon, and fennel seeds.  Add the olive oil, 1/2 tsp salt and a generous grind of pepper and whisk until well combined.  Set aside.
Using a small, sharp serrated knife, slice off the top and tail of each orange.  Cut down the sides of each orange, following its natural curve, to remove the skin and white pith.  Cut crosswise into slices 1/2 inch thick and remove the seed.
Put the oranges, dates, radishes, onion, arugula, lettuce, cilantro, parsley, and mint in a large salad bowl.  Stir the dressing and pour it over the salad.  Gently stir everything together, pile into a large but shallow bowl, and serve.
Posted in Recipes

Leek and Mushroom Quiche

IMG_2209
This quiche goes well with Turnip Potage Soup that I posted a recipe for last week!


Ingredients

1 pie crust

2 happy organic eggs

1 cup half and half

1 pinch nutmeg

1 block of feta about 1/8-1/4 cup

1/2 cup grated mozzarella cheese

3 small leeks (If you are getting them from your CSA the greens are tender enough that you can eat them too. Chop them up and steam them first with a pinch of salt and 1 Tbs cooking sake before sauteing white part)

4-5 sliced button mushrooms

*optional* A handful of chopped greens from your CSA (I used turnip greens but it can be kale, chard, mustards…I love adding greens to everything but there is more moisture in the quiche which could make your quiche a bit soggy.)

Preparation

1. As I mentioned above, steam the green part of your leeks if you have nice tender greens. If not saute the white part of the leek.

2. Add the mushrooms and saute a few more minutes.

3. Add the greens too if you like and saute until they wilt. Season with salt and pepper.

4. Put the mixture in a pie crust.

5. Beat the eggs, add cream and nutmeg and pour the mixture over the sautéed leeks and mushrooms.

6. Top with feta and mozzarella cheese.

7. Bake 30 minutes at 375 degrees F preheated oven.


Posted in Recipes

Turnip Potage Soup

I love eating Hakurei turnips raw! I’ve had them in salads and as an appetizer, sliced up with a drizzle of soysauce all week. It was a bit chilly today so I was craving comfort food. I decided to make a leek and feta quiche so I looked up a recipe for cooked turnips and I came across this potage soup on a Japanese site. I modified a few things and it turned out creamy and delicious. The serving is only for 2 people but you can easily make more.

IMG_2207

Ingredients (Serves 2)

2 turnips

1 cup stock

1 Tbs butter

Turnip greens from 1 turnip

A pinch of salt

3-4 Tbs miso (Preferably white but I only had red and it was fine.)

Preparation

1. Cut the turnips in half.

2. Chop the turnip greens in 1/2 inch size. Set aside.

3. Lay the turnips cut side down in a small pot and add water. There should be enough to cover most of it. It’s ok if the tops poke out a little. Turn on the heat and bring to a boil.

4. When it comes to a boil, turn down the heat and simmer 15-20 minutes until a fork easily goes through it.

5. Use an immersion blender or food processor to puree the turnips.

6. Add the butter, salt, miso and milk. Be careful not to boil it or the miso will lose its vibrancy.

7. Add the greens at the end just enough to wilt them. Serve hot.

Posted in Recipes

Zucchini Fritters with Shiracha Mayo

IMG_1946

Ingredients

3 cups zucchini, grated

1 cup green onions, chopped

1 handful seasonal herbs, in which case Thai basil at the moment!

2 eggs

1 block feta cheese, crumbled (optional but it adds the salty factor really well)

1 cup local organic all purpose flour

1 tsp baking powder

1/2 tsp chipotle chili powder

salt

pepper

MIx everything together and drop spoonfuls of it in well heated coconut oil or oil of your choice.

For the dip, mix 1 cup of mayo with a squeeze of shiracha hot sauce.


Posted in Recipes

Keema Curry with Summer Squash and Chickpeas

There is something about curry that gets my appetite going. I’ve been avoiding cooking on the stove top to get away from the heat and have been eating pasta salads, cold noodles and bean salads but sometimes you just crave eating something hot and spicy in the thick of summer!

Image


Ingredients

1 medium yellow squash, cut in 1/2 inch slices

1 medium zucchini, cut in 1/2 inch slices

4-5 new fingerling potatoes, diced

1 carrot, diced

1 onion, finely chopped

4 cloves garlic, minced

1 can tomato sauce

1 can chickpeas

grated ginger, size of your thumb

1 tsp turmeric

1 Tbsp garam masala

1 Tbsp curry powder

1/4 coriander

1 pinch of hot pepper flakes

salt and pepper to taste

1. Sauté onion over medium heat for about 15- 20 minutes or until it gets translucent. Add the minced garlic and saute a few more minutes.

2. Add the diced carrots and potatoes and saute for 5 minutes. Add the summer squash, canned tomato sauce and a cup of water. Let it come to a boil and turn down heat and simmer 10 minutes.

3. Add the chickpeas and spices and simmer for another 10 minutes.

4. Serve with brown rice or nan.